
This text provides a comprehensive guide to removing grout stains, emphasizing understanding cause and type for effective solutions. It recommends starting with basic cleaners like vinegar or baking soda for surface stains. For deep-seated issues, specialized products are required, such as disinfectants for mold/mildew or degreasers for oil/grease. Essential tools include a high-quality grout cleaner, stiff brush, sponge, warm water, and a vacuum with a small attachment. Natural cleaning agents like baking soda and vinegar offer eco-friendly options, while chemical cleaners require careful application and patch testing. Steaming is an eco-conscious alternative that deep cleans without harsh chemicals. The guide also highlights common mistakes to avoid, proper cleaning techniques, and regular maintenance practices for long-term grout stain prevention.
Looking to revive your tile grout? You’re not alone—grout stains are a common household hassle. This guide tackles deep cleaning for grout stains head-on, offering insights into understanding stain causes and types. From essential tools and natural remedies to chemical cleaners, steaming methods, and prevention tips, we provide a comprehensive strategy for effective grout stain removal. Discover expert advice on maintaining long-lasting, clean grout without the hassle.
Understanding Grout Stains: Causes and Types
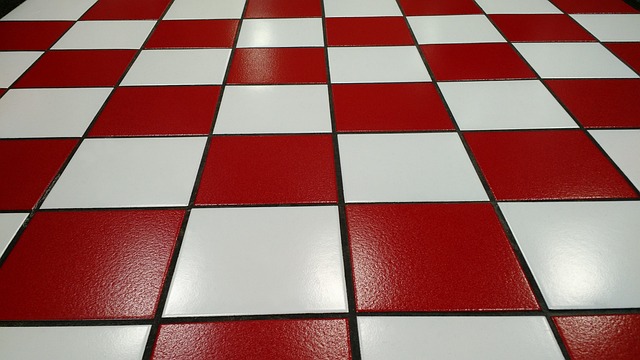
Grout stains can be a common concern for many homeowners, as they can range from surface dirt and grime to more persistent marks caused by mold, mildew, or even oil and grease. Understanding the causes and types of grout stains is the first step in effective grout stain removal.
Surface stains are often easily removable with regular cleaning solutions like vinegar or baking soda. These cleaners can dissolve common contaminants and restore the grout’s original color. However, more deep-seated stains may require specialized products designed for grout stain removal. Mold and mildew, for instance, thrive in dark, damp spaces within the grout, making them challenging to eliminate without proper disinfectants. Similarly, oil and grease stains often necessitate the use of degreasers to break down and lift these resilient marks.
Tools and Materials Needed for Deep Cleaning

When it comes to deep cleaning grout stains, the right tools and materials are essential for achieving optimal results. For effective grout stain removal, gather the following items: a good quality grout cleaner or powder, a brush with stiff bristles, a sponge or cloth, warm water, and a vacuum cleaner with a small attachment. The grout cleaner will be your primary weapon, as it’s specifically designed to cut through grease, grime, and stains. A sturdy brush will help you scrub away stubborn residue, while the sponge or cloth serves to wipe down the area afterward. Warm water helps in softening and loosening the stain, making it easier to remove. Finally, a vacuum cleaner with a small attachment ensures that any remaining debris or dirt is sucked out, leaving your grout sparkling clean.
Step-by-Step Guide to Removing Grout Stains

Removing grout stains can seem like a daunting task, but with the right approach, it’s achievable. Here’s a step-by-step guide to help you tackle these stubborn marks:
1. Identify and Prepare: Start by identifying the type of stain and preparing your tools. Gather white vinegar, baking soda, a stiff brush or sponge, and protective gloves. Protect your surroundings with drop cloths to avoid any mess spreading.
2. Pre-treat the Stain: Apply a mixture of equal parts white vinegar and water to the stained area. Let it soak for about 15 minutes, allowing the natural cleaning agents to penetrate the grout lines. For tougher stains, add a teaspoon of baking soda to enhance its cleaning power.
Natural Cleaning Solutions for Mild Stains

For those seeking eco-friendly and cost-effective solutions, natural cleaning agents offer a promising approach to grout stain removal. Baking soda, a common household item, is known for its effective yet gentle scrubbing action. Creating a paste by mixing baking soda with water can help lift mild stains. This simple mixture acts as a mild abrasive, safely scouring away dirt and discolouration without damaging the grout.
Additionally, vinegar, another versatile natural cleaner, can be used to combat hard-water stains. Its acetic acid content helps dissolve mineral deposits and dislodge stubborn stains. Combining equal parts vinegar and water in a spray bottle allows for easy application and rinsing, leaving your grout lines refreshed and stain-free. These natural solutions are not only kind to the environment but also safe for use around sensitive areas like bathrooms and kitchens.
Chemical Cleaners: When and How to Use Them

Chemical cleaners can be highly effective for grout stain removal, especially for tough or set-in stains. However, their use should be considered carefully. These powerful substances can strip away not just dirt and stains but also the protective coating on grout, leading to further discolouration if not applied correctly.
When using chemical cleaners, always follow the manufacturer’s instructions precisely. Wear protective gear like gloves and goggles for safety. Start by testing a small, inconspicuous area first to ensure it doesn’t cause any adverse reactions with your grout. For best results, apply the cleaner directly to the stain, let it sit for the recommended time, then scrub gently before rinsing thoroughly with warm water.
Steaming as a Powerful Stain Remover

Steaming is an effective and eco-friendly method for grout stain removal, offering a deep clean without harsh chemicals. This process involves using steam to soften and break down dirt, grime, and organic compounds embedded in the grout lines. The high-temperature steam penetrates deep into the grout, loosening stains and allowing for easy wiping away.
Compared to traditional scrubbing methods, steaming is gentler on surfaces and doesn’t cause wear and tear. It’s a quick and efficient way to refresh the look of your tiled spaces, leaving them clean and free from unsightly grout stains. This method is especially beneficial for those who prefer natural cleaning solutions or want to avoid the potential damage caused by abrasive cleaners.
Common Mistakes to Avoid During the Cleaning Process

When tackling grout stain removal, it’s easy to make mistakes that can hinder your progress or even cause further damage. One common blunder is using aggressive scrubbers or harsh chemicals straight away, which can scratch the grout surface or lead to uneven cleaning. Always opt for gentler methods first; a soft-bristled brush and a mild cleaning solution are often all you need to loosen stains.
Another mistake to avoid is ignoring the type of grout and tile in your space. Different materials require unique care, so using the wrong cleaner can result in discolouration or damage. Always identify your grout and tile type before selecting a cleaning product. Additionally, skimping on pre-cleaning or not rinsing thoroughly after cleaning can leave behind residue, making your efforts less effective and potentially causing new stains to form.
Preventing Future Grout Stains

After successfully removing stubborn grout stains, preventing future occurrences is key to maintaining a fresh and clean look. Regular cleaning and maintenance are essential practices to adopt. Start by sweeping or vacuuming floors frequently to eliminate loose dirt and debris that could re-deposit into the grout lines. Moist mopping with a mild detergent can also help trap and remove any lingering contaminants.
Additionally, sealing the grout with a suitable product after deep cleaning acts as a protective barrier. This step repels liquid and prevents stains from setting in again. Remember, preventing future grout stain removal is more effective and less labor-intensive than frequent deep cleaning.
Maintenance Tips for Long-Lasting Clean Grout

Regular maintenance is key to preventing grout stains and keeping your spaces looking their best. After deep cleaning, incorporate a weekly routine of vacuuming or sweeping to remove loose dirt and debris. This simple step prevents particles from settling into the grout lines and causing discolouration over time. Additionally, use a damp microfiber cloth to wipe down surfaces once a week, removing any spills or marks promptly.
For long-term protection, consider sealing your grout every 3-6 months. Grout sealers create a protective barrier, preventing stains from penetrating the pores of the grout. This step is especially important in high-traffic areas like kitchens and bathrooms. By combining regular cleaning with occasional sealing, you can significantly extend the life of your clean grout and maintain that fresh, vibrant look for years to come, ensuring effective grout stain removal practices.